Five Simple Tips to a Better Architectural Photo


I thought we’d relax after yesterday’s trip to Vancouver with a little photography.  I was fascinated to see that a full 89% of you who responded to the recent Urtak survey said you enjoyed photography, so I hope this next post will prove to be both interesting and useful to many of you.

I had the enormous pleasure of meeting Michele, a professional architectural photographer, on the Blogging Your Way weekend. Her blog is newish, but wonderful – she has a warm, witty, very funny voice and takes seriously awesome photographs.  And yes, you have to read her blog posts in a Brooklyn accent.

First of all, I’m totally having an anxiety attack because someone reads my blog. And not just someone, but the lovely, creative, funny, and incredibly spirited, Paola. And not only does she read my little photoblog, Tripping on Asphalt, but she likes it enough that she’s asked me to write something for her wonderful blog. I’m melting into a little puddle on the floor. Then she’s all, “Sorry for the short notice, Love” and I’m swooning over the super-cool accent (because, of course, I read her emails with an accent), and in my head I’m all, “seriously, sister; if you’d given me a week instead of 24 hours, I’d’ve died from an anxiety attack instead of getting myself together and writing this post”.

So here we are! My name is Michele, and I began my architectural photography business, Sequined Asphault Studio, back in 2005. I was born and raised in Brooklyn and now live in Connecticut with my very tall husband and my very small dog, who I am trying to teach to work a cocktail shaker. If you’d like to get to know me a bit better, consider yourself warned, but you can read about some of my random idiosyncrasies on my blog, Tripping on Asphalt .

Paola tells me you love photos! So we thought I’d share with you just a few of the techniques I use to create an image; techniques that you can easily steal to make your own photos even better. For the last tip you’ll need a dslr/slr and be able to set it to manual mode, but for all the others any camera will do. Now, I tend to steer away from the how-tos for fear of being Miss Bossy Pants, but for Paola, I’m going to be adventuresome. I humbly present to you, Five Simple Tips to a Better Architectural Photo.


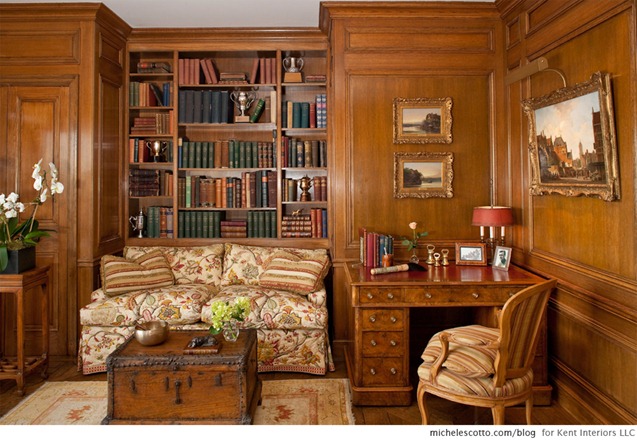
Tip 1:   Use a Tripod.


scotto1

I basically can’t talk to you any more if you don’t follow this advice, because everything else I’m going to tell you requires you to put down the camera so that you can be more conscious of everything in your shot. If you’re using one already, 5 points for Gryffindor! If you are not, don’t despair, just give it a go. And don’t break the bank if you don’t have one already. Chances are you can find something in a friend or relative’s basement. If not, get an inexpensive base model and it will serve you loyally.

Now, if you are attempting to get a shot of newly mobile toddlers using a tripod, you will get a headache trying to get them in frame, which will lead to more vodka and less pictures. But a tripod can elevate many types of photography, even, or maybe especially, a basic family portrait where you can mindfully set up your shot and possibly hop in after you’ve set the timer.


Tip 2:  Be Conscious of Your Lines


scotto2


Now that your camera is on a tripod, look through your viewfinder at the walls, moldings, doorways, bookcases, trees, or anything that creates a right angle or parallel lines within the frame of your photo. Get right up in your viewfinder and position the camera so these lines are as straight as possible. Especially the floor and ceiling. I shoot directly to the computer and can double check on a larger screen, but you can use your viewfinder and LCD screen quite effectively. Most often when things look cockeyed on the screen after I’ve take the time to perfect my lines, I find I’ve been looking through the camera at some messed up angle, so make sure you’re not crooked either.

While you’re at it, analyze the lines you’ve got. If you don’t want to see the ceiling, zoom in and get it out of there. Make sure those lines include exactly what speaks to you to photograph. Nothing more, nothing less.


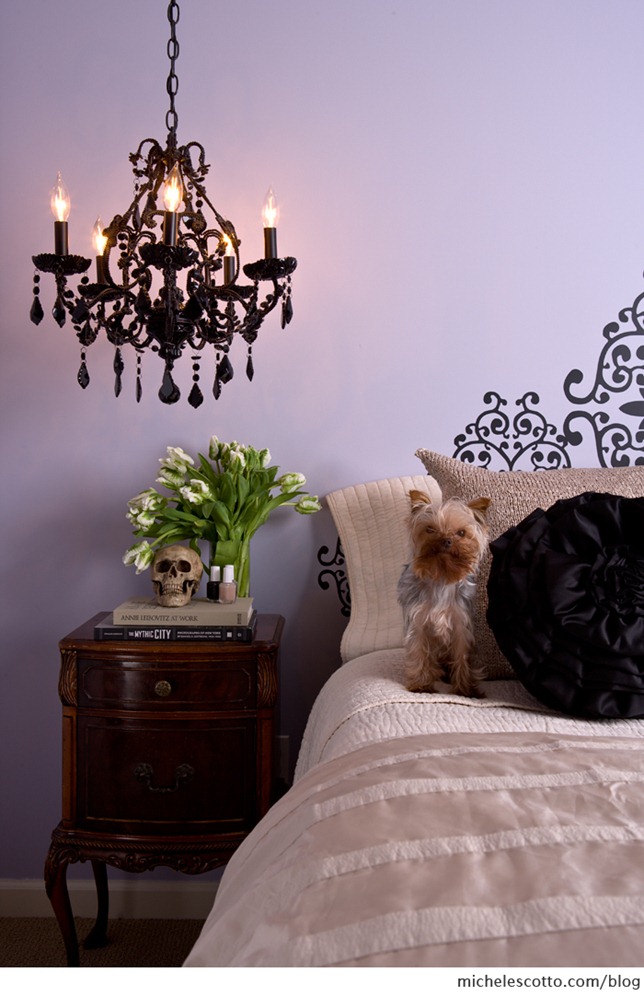
Tip 3: Consciously Choose Objects to Convey the Mood


scotto3

My husband, Dug, is convinced that my 3 pound Yorkie, Chewbacca, would make every single photo I take better. (Paola would likely prefer a disinterested cat.) I’ve unsuccessfully tried to explain to Dug that at some point, people might stop paying me for my services if I refuse to take photos without Chewie. To which he calmly shakes his head and repli es, “Have they met him?”

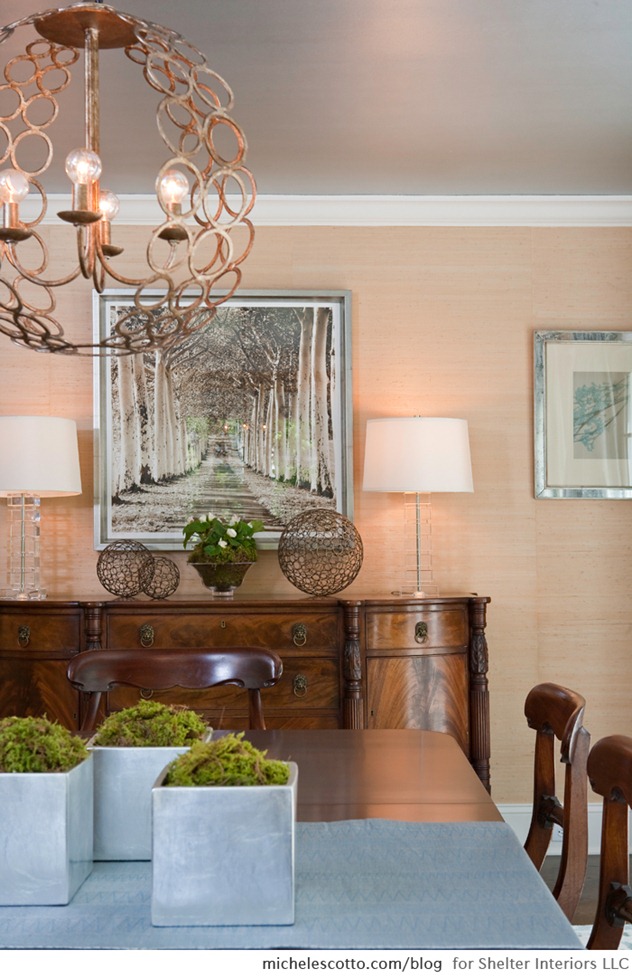
But Dug makes an excellent point. Animals warm the heart and can create a more inviting photo. Embrace animals, or items that show personality. Since this shot was taken in my own home, it was super simple to grab Chewie and everything on that nightstand from other places in the house to create a quick scene that reflects me, instead of the clutter that was actually there, which also reflects me, though I’d prefer my used Kleenex and iPhone charger not be recorded for posterity.


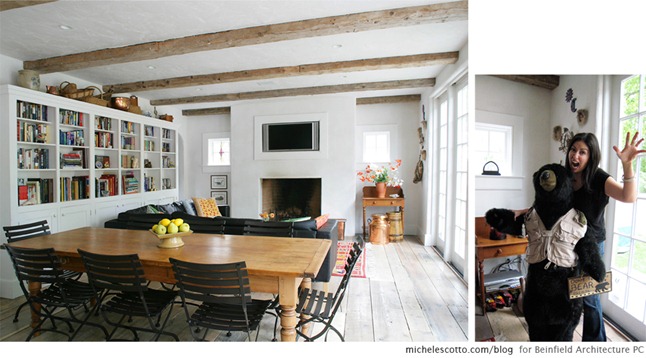
Tip 4:  Declutter and Edit Out Objects that You Don’t Want Stealing the show


scotto4


Sometimes there can be too much personality. Go ahead and move stuff out of the frame that’s distracting. Declutter. And here we come back to the tripod again. Because once you’ve got the camera pointed at your subject matter, you can keep going back and checking the composition to actively decide what you want in the frame and what you don’t. Get all the crap out of the way because the only thing that matters for your photo is what the camera can see. Armageddon can be, and often is, 2 inches outside of the frame, and no one will ever know.

I loved this bear. I totally wanted to take him home. But if I’d left him in the shot, no one would be looking at the architecture, right? They’d be all, ‘Bear!’ Which was pretty much how I felt all day at this shoot. “Bear!’ We even set him a place at lunch. You can also see the equipment and wiring in the corner behind me that we covered with the homeowner’s cool jugs (now I’ve gone and accidentally made a boob reference and I’m never going to get invited back).

OK, bear with me while we get a tad technical. (and now I’m punning, how unfortunate)


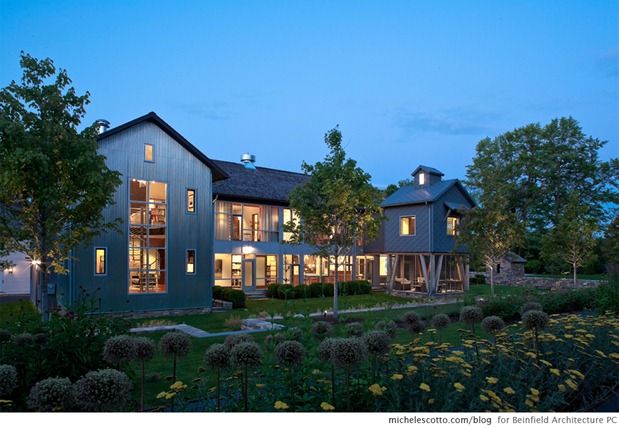
Tip 5: For a Sharp All Over Photo, Set a Large Numbered f-stop


scotto5

When I’m setting up an overall, wide-angle shot, I want everything as crisp and sharp as possible throughout the entire image. None of the beautiful bokeh, the blurred background that pops your subject, people love so in portraits. To make this happen using only available light, crank the f-stop setting to as high a number as you can go (a higher number is actually considered a smaller f-stop because it means the resultant opening for light is very small), then find your shutter speed through experimentation. You’ll need a much longer exposure, so just keep adjusting your shutter speed to find the right balance of light. Anything moving in a long exposure shot, like an animal, person, or branch in the wind, will end up a motion blur, which can be pretty interesting.

This night shot is an extreme example but the shutter was open for 3.2 seconds and the f-stop set at f/16. Obviously I couldn’t hold the camera still for 3.2 seconds, so thanks to my trusty tripod, that’s 3.2 seconds during which I was sipping pinot noir.

Our time here has come to an end, lovelies. I thank you so much for the opportunity to chat, and thank you Paola for having me as your Guest Blogger for the day! I’d love to hear if you’re able to make use of any of these tips, or if you have any questions I can tackle about the kinds of photos you see on my site or in the design magazines. Drop by any time for a visit.

xoxo MS T
   
Share

Vancouver in Five


Please welcome Sandra from Raincoast Cottage to the blog. She’s a Vancouverite who recently moved back there from Toronto, so who better to tell us of some of the great new places she’s found in her old home town. I’m also shamed that she has made more progress doing up her cottage since she moved in six months ago, than we’ve made in this house in over five years. Check out her cottage on her blog. It’s lovely.

Five favourite spots that is! Welcome to my city – my old home town. You see, I lived out east for ten years and only returned to Vancouver late last summer. So there’s been more than a bit of exploring happening around here as I discover my new favourite places to shop and eat. And I am happy to share five of them with you.

When I left Vancouver, the neighbourhood just east of Gastown was a bit sketchy. More than a bit sketchy. So sketchy that you could never begin to imagine any gentrification. But it has. It still has its edginess – but that gives it its charm. And this is where we will start on our tour of my five favourite places.


Nelson the Seagull

nelson-the-seagull


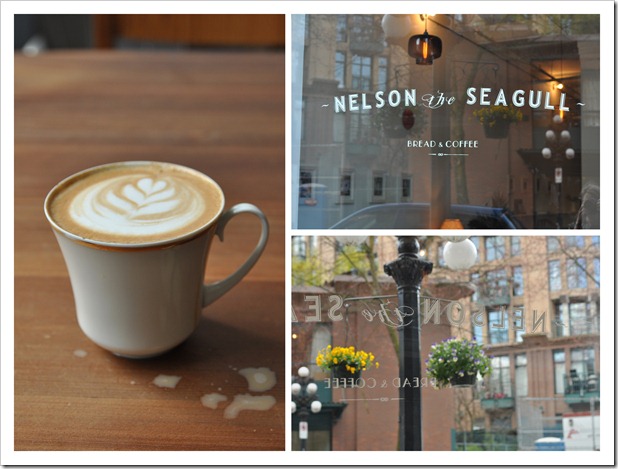
You are in the Pacific Northwest so the very first stop is going to be for a coffee. How could it not be? And not just any coffee – one from Nelson the Seagull. They know how to pull shots. And although they do have a yummy menu (let’s come back for lunch), once we have our coffees, we’re going to step out and walk down to Cartem’s Donuterie.


Cartem’s Donuterie

To go with your coffee, do I have a treat for you. And it’s less than a block away. It’s a tiny, tiny place making THE best handmade donuts from only locally sourced, organic ingredients. I know, you think that you have had good donuts, that you know all about them. How can they get any better? Well, they can. And they are.

cartems-donuterie

What about some of these flavours – Earl Grey, maple topped with bacon (and some Bourbon too!), carrot cake, even vegan options. And they even deliver but only downtown – it’s by bike so they stay on this side of the bridges.

Now that we are fed and watered, how about a visit to The Old Faithful Shop?


The Old Faithful Shop

oldfaithfulcollage


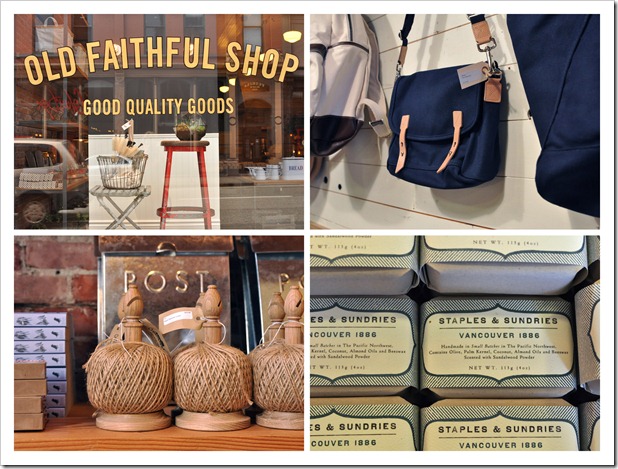
I know that “well curated” is such an overused phrase now but I can’t think of a better way to describe the goods that the Old Faithful Shop carry. Savannah, one of the owners, is originally from the Canadian prairies – her friendly personality is a dead giveaway. She and her partner Walter stock all sorts of goods from all over the world that are well made and unique. You can shop online too!

Urban Source

urban-source


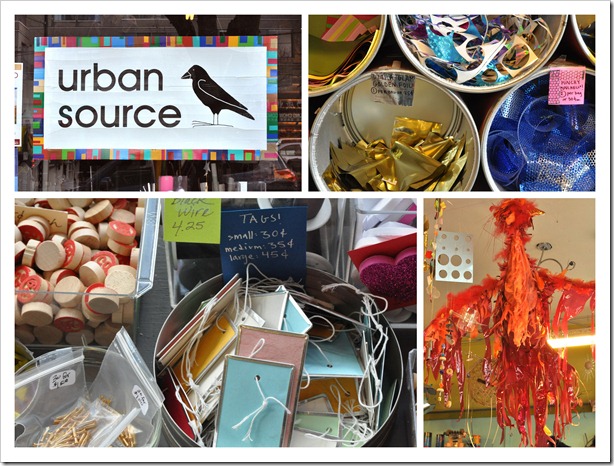
Feeling inspired to make something? Want something a little different than your usual art supply store? Let’s scoot over to Urban Source. For over 15 years, Urban Source has been the place to go for alternative art materials. It’s not a big place but it is full from top to bottom with bins of materials collected from over 100 local businesses. Most of it you buy by the paper bag. Grab the size you want and start filling it up. And then when you get home, start making some art.


Metropolitan Home


met-home-vancouver


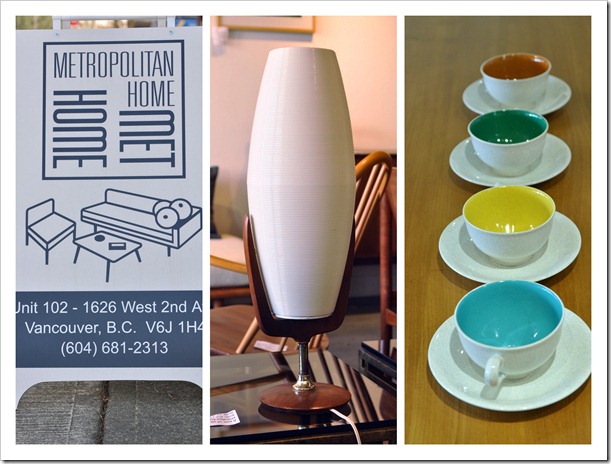
A trip to Vancouver would not be complete without some vintage furniture shopping. For our last stop we’ll visit Metropolitan Home for a dose of mid-century modern furniture. Located in the Armoury District near 2nd and Fir, there’s lots to catch your eye – both in furniture and decor. I have that table lamp and there is a floor version too.

Thanks for joining me to visit five of my favourite places in Vancouver! And visit me at www.raincoastcottage.com where I write about living a creative life.

   
Share

Guest Bloggers!


So the quality of blogging round these parts is going to soar over the next few days. (Thank goodness, I hear you cry!)

For the first time in its excruciatingly long and illustrious history, mirrormirror will be featuring guest bloggers.

pink-nail-polish

While I am chilling at the beautiful L’Auberge del Mar (or more likely visiting Legoland), you will be travelling the world in the company of four fabulous guest bloggers and erstwhile members of the mirrormirror commentariat.

virgin-airlines-cabin


Sandra, the stylish mastermind behind Raincoast Cottage, will be taking you on a tour of Vancouver; interior designer Tina from Life in Sketch will show you her hidden New York; and the lovely Liz from Violet Posy will be whisking you to Ely, the ancient English market town that she calls home. In addition pro architectural photographer Michele from Sequined Asphault will be giving you her top tips for creating great architectural photos.

Please leave lots of encouraging comments on their posts and click hard and often on the links to their blogs, to make it worth their while and ensure that they come back to blog here again.

I’d say ‘don’t miss me too much’ but I have a feeling you’re not going to miss me at all. Please leave any good tips for things to do in Del Mar, Dana Point or San Diego in the comments and follow my progress on Twitter and Instagram. I’m @mirrormirrorxx.

See you on Monday!

   
Share

Washington Tulip Fest 2012


Yes my dears it’s that time of year again, when we go and visit the spectacular Washington tulip fields and then I get to bore you all my photos. And yes I do realise you’ve seen very similar photos before.  Long time readers may want to grab a cup of tea at this point.


washington-tulip-festival (2 of 17)

washington-tulip-festival (12 of 17)

washington-tulip-festival (4 of 17)

washington-tulip-festival (1 of 1)-2

washington-tulip-festival (1 of 17) washington-tulip-festival (7 of 17)

washington-tulip-festival (9 of 17)

washington-tulip-fest (1 of 1)-3

washington-tulip-festival (14 of 17) washington-tulip-festival (16 of 17)

washington-tulip-fest (1 of 1)-2


You will have noticed that a certain not-so-little-anymore Minx was also avidly photographing. That’s one of her pics below.  I’m such a proud mama!


We’re still quite early in the season.  If you live in the Pacific Northwest I reckon you’ve got at least two more weeks to see the splendour.

   
Share

WTF Monday: Wenlock and Mandeville


Only three days late.  One day I’ll get good at this ‘blogging to schedule’ malarkey.

So we touched on this in the comments to a recent post, but I thought it was time we properly dealt with London’s Olympic shame.

When it was announced that London had won the Olympics bid, I was looking forward to my home town showing the rest of the world why it is a capital of style, creativity, incredible design and all round fabulosity.

 wenlockandmandeville


And then the mascots – Wenlock and Mandeville -  were unveiled (the logo I can’t bear even to talk about).  They are apparently supposed to be one-eyed drops of steel from the construction of the Olympic stadium, with London taxicab lights stuck on the tops of their heads.  Of course.  As an aside, I can’t find any reference to why Mandeville has apparently peeed his pants.

So, really, aren’t these more scary than attractive?  Is anyone going to buy them/collect them?  Aren’t they just embarrassingly lame? 

I did do a one kid focus group with the Minx and she thought they were ‘cute’, so maybe I’m not the target market here. Though the Minx’s strange taste is already on record. 

What do you think? What do your kids think?  Are these an embarrassment to London? UK peeps, are the mascots much in evidence in the run-up to the Olympics or is everyone just trying to pretend they don’t exist?

Buy Wenlock and Mandeville here if you must.

   
Share

The Best Easter Simnel Cake


So, Simnel Cake.

I know I should have posted this last week but I actually wanted to try the cake and see if this recipe was worth sharing with you.  And wow it really is.  Suffice it to say that four days after Easter this cake is already but a distant memory.  Do yourselves a favour and bookmark this recipe for next year.

simnel-cake (5 of 6)


First up a bit of history.  Apparently Simnel Cakes go back at least to medieval times when they were traditionally served on Laetare Sunday, a day in the middle of Lent when the Lenten fast was relaxed (sounds like cheating to me).  Since this day coincides with Mother’s Day in the UK, it was apparently the thing in Victorian times for daughters in service to bake a Simnel Cake to take home to their mothers.

Nowadays it’s thought of as an Easter cake, though it’s not very often made.  I think this is the third one I’ve made in my life.  Which is a shame, as it’s extremely delicious and not at all difficult.

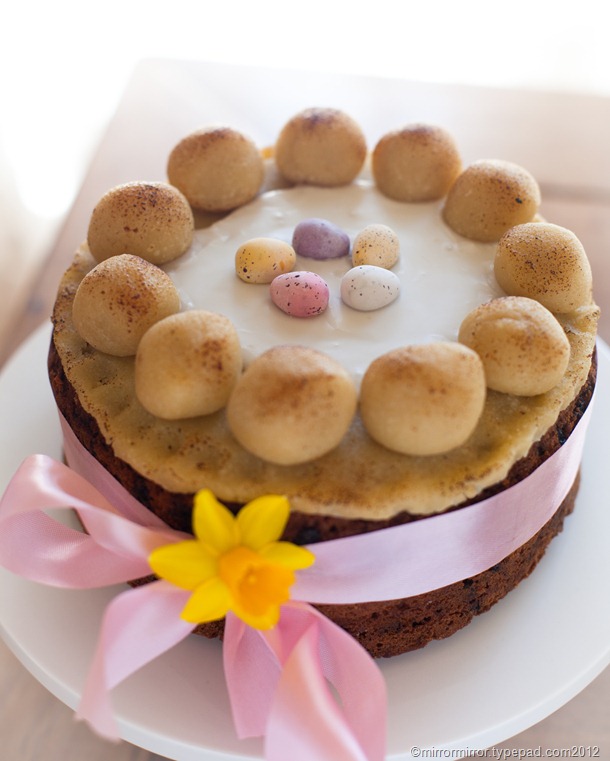
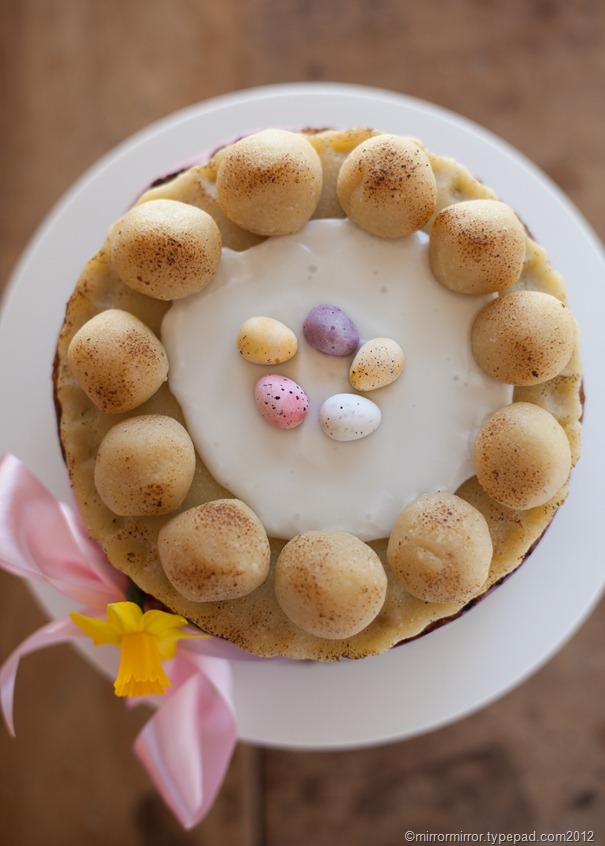
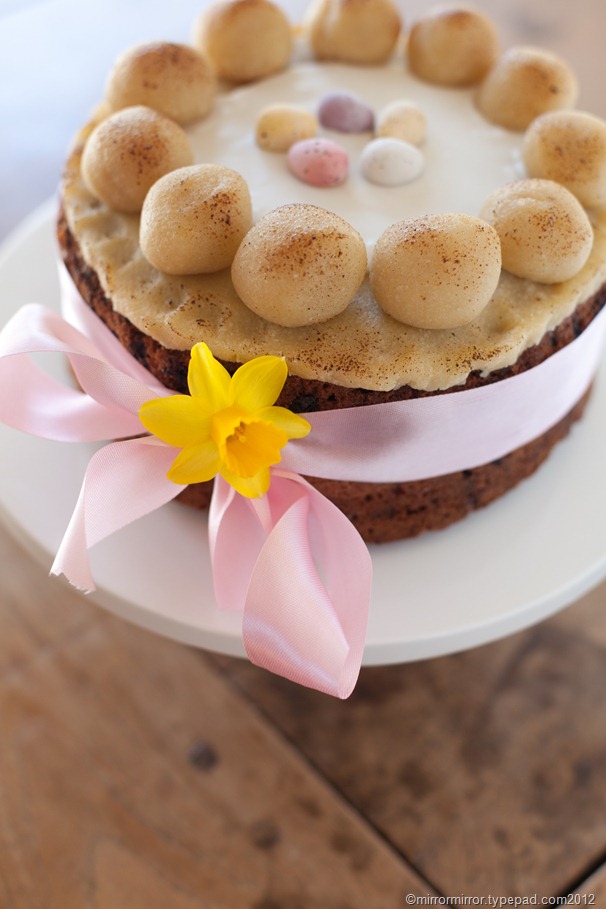
Traditionally it’s a light fruit cake, stuffed full of vine fruits and spices, with a layer of marzipan baked into the cake and more toasted marzipan placed on the top.  There are always eleven marzipan balls placed on the top to represent the Apostles minus Judas Iscariot.  I also like to add a puddle of icing and some Cadbury’s Mini Eggs (they’re in the Bible somewhere, right?), but anything Easter-y such as chicks or flowers would do.  I think it’s safe to say that if you don’t like marzipan you will not like this cake.  If you do, though (and as far as I’m concerned marzipan should be a separate food group) then this tastes a little like a fruity, squidgy, non-bready stollen. 

If you live in the UK or anywhere where it is possible to get hold of good marzipan, then you need to buy around 450g/1lb of the stuff.  However, making your own marzipan is very quick and easy and it certainly tastes infinitely better than the peculiar canned almond paste I’ve found in the US.

I’m afraid I haven’t had time to convert to cup measures.  Time to get out those weighing scales!


simnel-cake (2 of 6)


This recipe is a combination of two or three recipes I found on the BBC website. Most traditional Simnel cake recipes are very similar though.

Ingredients

For the marzipan/almond paste

250g/9oz caster/baker’s sugar

250g/9oz ground almonds/almond meal

2 free-range eggs, beaten

1tsp almond essence or to taste

Mix the sugar and almonds in a large bowl and add the almond essence and enough beaten egg to turn the mass into a soft, sticky ‘dough’.  Knead everything together for one minute or so, until it becomes smooth and pliable. If it is too sticky add a little more sugar and almonds.  You want a workable mixture that is possible to roll out.  The marzipan will happily wait a day or two in the fridge.

For the cake

110g/4 oz raisins

110g/4oz sultanas/golden raisins

110g/4oz glacé/candied cherries (in the UK use those delicious undyed ones, I’ve yet to find a supplier of non-HFCS, undyed cherries in the US, if you come across such a delight please let me know)

110g/4oz currants/Zante currants

50g/2oz chopped candied peel (in the UK, you can buy pots of mixed peel, in the US I mix my own from orange, lemon and citron peel)

225g/8oz butter, softened

110g/4oz light muscovado sugar/soft brown sugar

110g/4oz caster/baker’s sugar

4 large eggs

225g/8oz self-raising flour (or 8oz all-purpose flour with 1 tsp baking powder)

1/2 teaspoon salt

2 lemons, grated zest only

2 tsp ground mixed spice (or 1 tsp ground cinnamon, 1/2 teaspoon ground allspice, 1/4 teaspoon ground nutmeg, 1/4 tsp ground cloves. You could also use pumpkin spice but it will taste a little different).


For the glace’ icing

225g/8oz icing sugar/powdered sugar

Enough water to mix to a pouring consistency.


simnel-cake (4 of 6)


Preparation method

  1. Cut the cherries into quarters, put in a sieve and rinse under running water. Drain well then dry thoroughly on kitchen paper. Do the same with your peel if it is sticky with HFCS.

  2. Weigh out all the fruit into a large bowl. Essentially you need around 500g/18oz of mixed dried fruit, so if you want to make some substitutions (pineapple, dried cherries or cranberries might be nice) or play around with the proportions then be my guest.  This mix is the traditional one for a Simnel cake though. If you’re feeling fancy then you can soak the fruit overnight in some amontillado sherry, but I didn’t with this cake.

  3. Preheat the oven to 150C/280F/Gas 2. Grease and line a 20cm/ 8in Springform cake tin.

  4. Cream the butter and sugars together in the stand mixer until very pale and soft.

  5. Beat in the eggs one at a time with a tablespoon or two of flour between each egg addition to stabilise the mixture and prevent curdling.  If it curdles a little it’s not a big deal.

  6. Stir in the rest of the flour and salt, the lemon zest and the spices. Mix until fully combined.

  7. Stir in the dried fruit with a wooden spoon until it’s fully distributed through the mixture.  The mixture should be of a soft ‘dropping’ consistency.  If it is too dry then stir in a tablespoon or so of milk.

  8. Spoon half the cake mix into the prepared cake tin

  9. Take o ne-third of the marzipan and roll it out to a circle the size of the tin and then place on top of the cake mixture.

  10. Spoon the remaining cake mixture over top and level the surface. I like to create a slight indentation in the centre so the cake doesn’t get too domed.

  11. Bake in the pre-heated oven for about 2 1/4 hours, or until well risen, evenly brown and firm to the touch.  A skewer or stick of spaghetti stuck into the centre of the cake should come out clean.

  12. Cover with aluminium foil after one hour if the top is browning too quickly. Leave to cool in the tin for 10 minutes then turn out, peel off the parchment and finish cooling on a wire rack.

  13. When the cake is cooled, turn it upside down.  If you want brush the top with a little warmed apricot jam and roll out half the remaining marzipan to fit the top. Press firmly on the top and crimp the edges to decorate. (My marzipan was sticky enough not to require jam).

  14. Make a stubby snake with the remaining marzipan third and cut it into 11 equal pieces. Form the marzipan into 11 balls.

  15. Brush the marzipan with beaten egg and arrange the marzipan balls around the edge of the cake. Brush the tops of the balls with beaten egg and then carefully place the cake under a hot grill/broiler until the top is lightly toasted or, as I did, use a chef’s blowtorch.  If you’re using the grill be careful not to set fire to the cake.

  16. Mix up the icing sugar and water to a pouring consistency and pour a puddle onto the surface of the cake.  When set, decorate with Easter-y things.


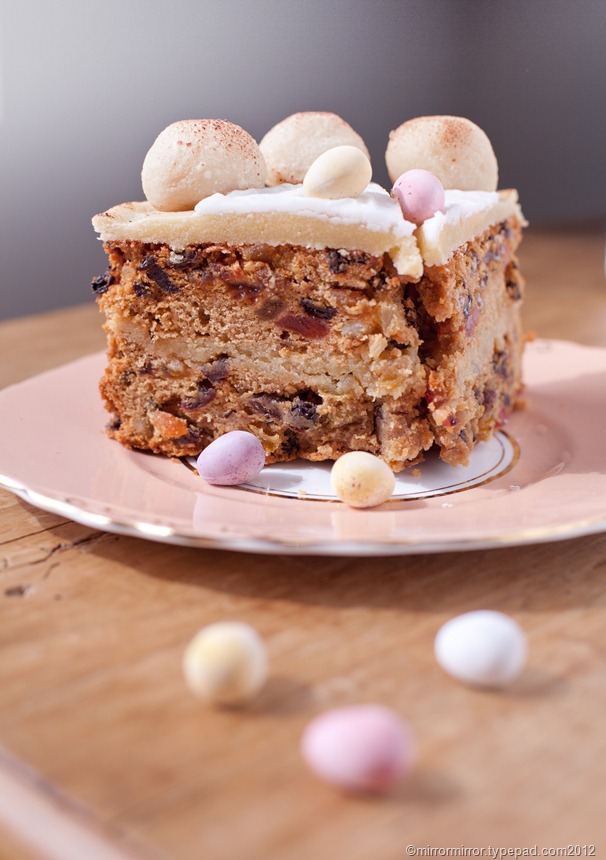
This is what your cake should look like inside. The layer of baked almond paste makes it all juicy, succulent and not at all dry, unlike many fruitcakes of my acquaintance.

Happy belated Easter!


simnel-cake (6 of 6)


I believe there are still a few tickets left for my ‘Baking in Translation’ class at Book Larder, where we will discuss the mysteries of baking using British recipes and using weighing scales rather measuring cups .  Buy them here, I’d love to meet you.

Share

That Was The Week That Was: Spring in Seattle Edition


Oh goodness, it’s been ages since I’ve done one of these.  It’s been a pastel-coloured, blossom-filled, playing in the sunshine, baking goodies couple of weeks.


instagrams-paola-thomas (1 of 24) instagrams-paola-thomas (2 of 24)
instagrams-paola-thomas (3 of 24) instagrams-paola-thomas (4 of 24)
instagrams-paola-thomas (5 of 24) instagrams-paola-thomas (6 of 24)
instagrams-paola-thomas (10 of 24) instagrams-paola-thomas (12 of 24)
instagrams-paola-thomas (13 of 24) instagrams-paola-thomas (14 of 24)
instagrams-paola-thomas (15 of 24) instagrams-paola-thomas (17 of 24)
instagrams-paola-thomas (11 of 24) i nstagrams-paola-thomas (9 of 24)
instagrams-paola-thomas (21 of 24) instagrams-paola-thomas (16 of 24)


On the 1st January I started posting daily photos to Instagram. I’m @mirrormirroxx. Come and be my friend.

Share

A Shopping Trip to Portland: Part 2


Here’s part two of my shopping guide to Portland.

You can see where I went with my girlfriends on the Friday in Part 1 here.  And pictures from  Portland’s Japanese Garden are here.

Here’s what we did on Saturday after the family came and met me on the Friday night.

After a leisurely breakfast at our hotel (we stayed again at the Nines, which is worthy of a separate blogpost), we wandered off to the Portland Saturday market.  To be perfectly honest I wasn’t terribly impressed. There seemed to be a lot of tat and not a huge amount of originality.

portland-shopping

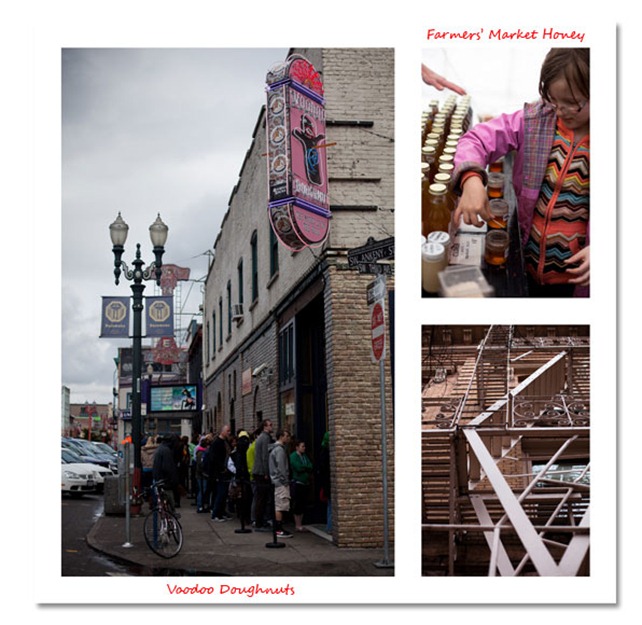
We then tried to get into the legendary Voodoo Doughnuts. The magic may indeed be in the hole, but weren’t going to stand in the mile-long queue to find out. I sort of regret that now.  Instead we jumped in the car and headed to the Farmers’ Market at Portland State University. This was more like it, on a par with the best of the Seattle farmers’ markets, but with new and different producers to try.

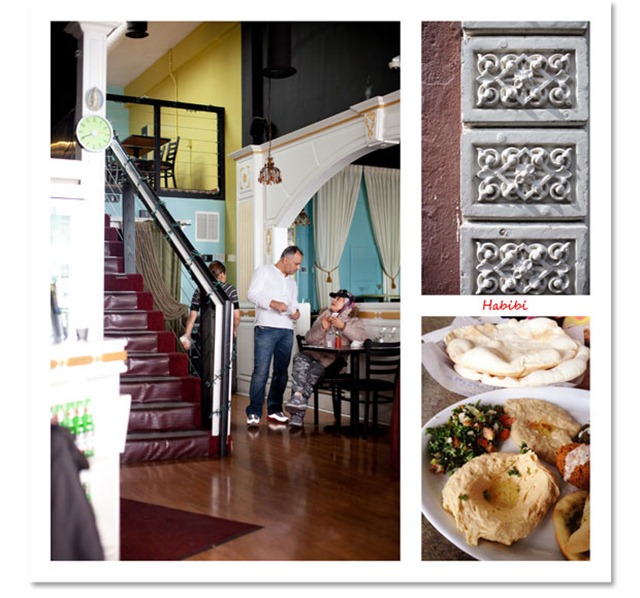
After the market we headed back downtown for lunch and went to Habibi for Lebanese food. It’s a cuisine I miss a lot from London, as I can’t find any very good exponents in Seattle, but here it’s done well – the food is fresh and tasty, with excellent rice, hummus and breads, though not particularly imaginative.


habibi-portland


From there we went back to a couple of shops I’d visited the day before and possibly my two favourite shopping finds in Portland so far.


woonwinkel-portland

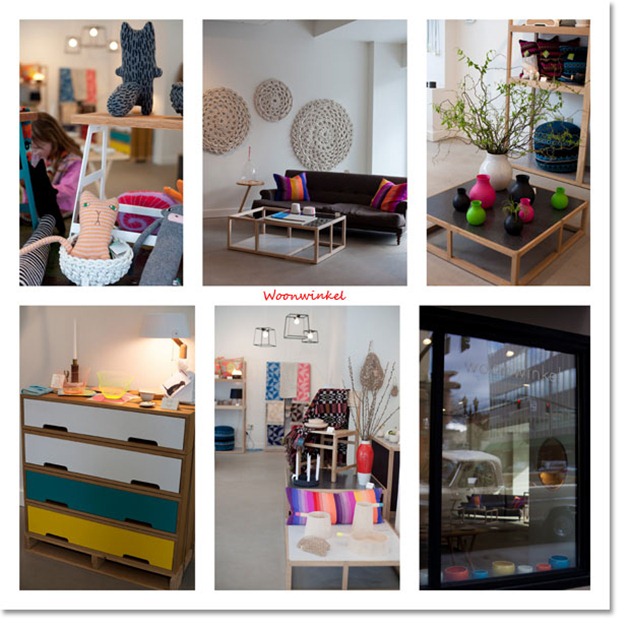
Woonwinkel focuses on colourful and graphic contemporary craftmade pieces – it’s the shop I wanted mirrormirror to turn into. They call it ‘new modern’: warm, inviting, tactile, quirky.  Modern with soul. I loved it, though left without purchasing.


alderco-portland


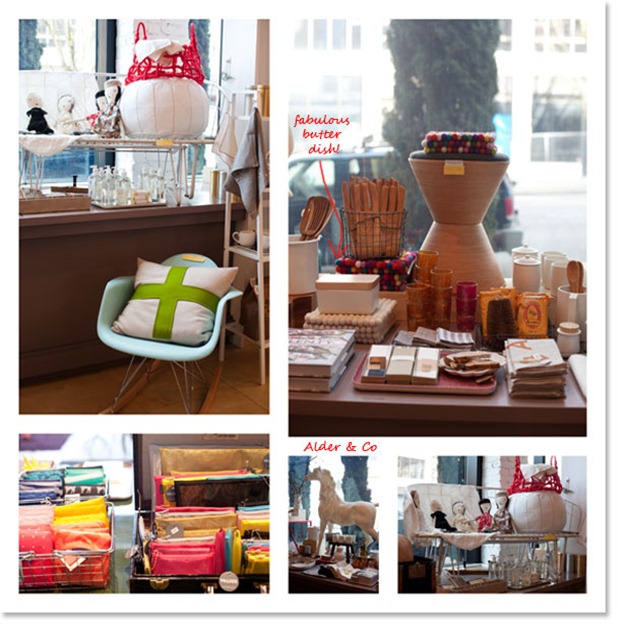
Alder & Co also does beautiful everyday items, with a clean, almost Japanese aesthetic.  I bought the most stunningly smooth and tactile (and stunningly expensive) stoneware Japanese butter dish and some beautiful wooden measuring spoons.

We then headed for Powell’s Bookstore, where I have to admit that I spent a lot of time surreptitiously photographing the covers of books that look good for later download on my Nook.  I sort of hate myself for doing this, though we did slightly assuage our guilty consciences by buying children’s books for the Minx. But please tell me how I can reconcile my love of independent bookstores with my Nook love?  I really haven’t figured this out yet.

ace-hotel-portland

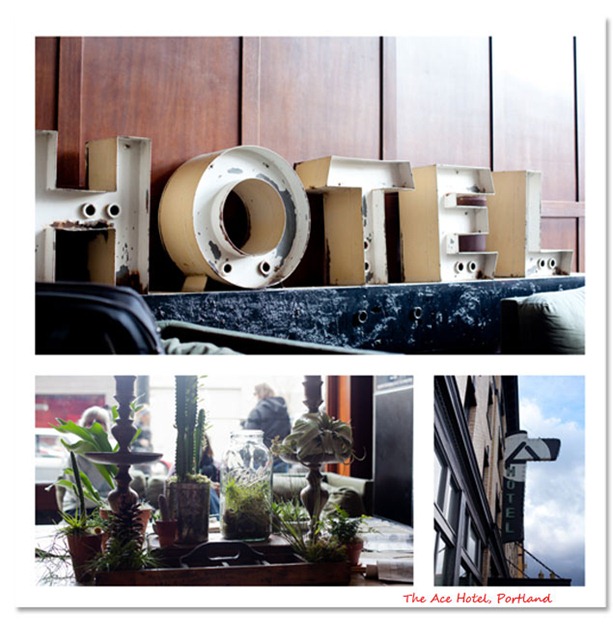
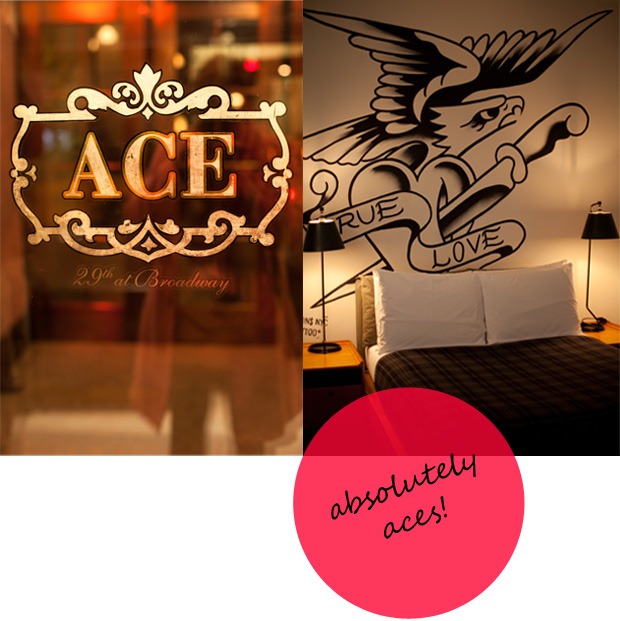
All the guilt was making me thirsty, so we headed over to Portland’s Ace Hotel for coffee in the downstairs Stumptown coffee shop. You buy your coffee and then can take it into the hotel lobby. I was intrigued to see the décor after my recent stays at the Ace in NYC and the Ace in Palm Springs.  Again they’ve done a great job of matching the Ace’s hipster aesthetic to its surroundings.  Not as smart as the NYC hotel, nor as carefree as the Palms Springs one, this was quirky, funky and yes, most decidedly hip.

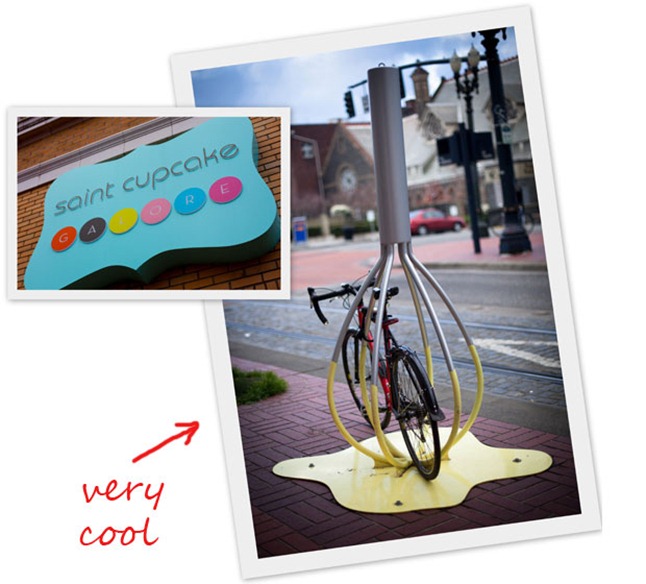
As we walked back home I saw this bicycle stand outside a cupcake shop.  I’ve no idea whether the cupcakes are good or not, but the bike stand just summed up Portland for me.


whisk-bike-stand

Tired but happy, we ended up heading back to the Nines for dinner, where the whole family sat in the king-sized bed, ordered burgers and mac’n’cheese from room service and watched Hugo on the big flat-screen telly.  I digress, but what a totally gorgeous and moving film that was. I’ve never been a big Scorsese fan before, but wow.

Share

The London Faberge Easter Egg Hunt


Because I am a glutton for punishment, I like to torture myself by including as many UK-based Instagrammers in my Instagram feed as possible.  So each morning I get big dose of homesickness while I feast my eyes on pics of every day British architecture, or gardens or foods.


Faberge-Egg1


big egg hunt3


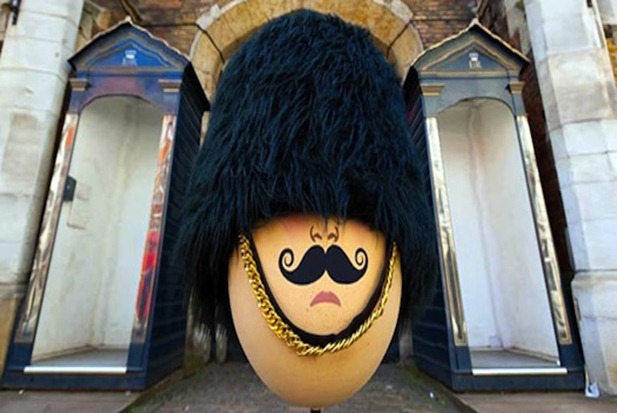
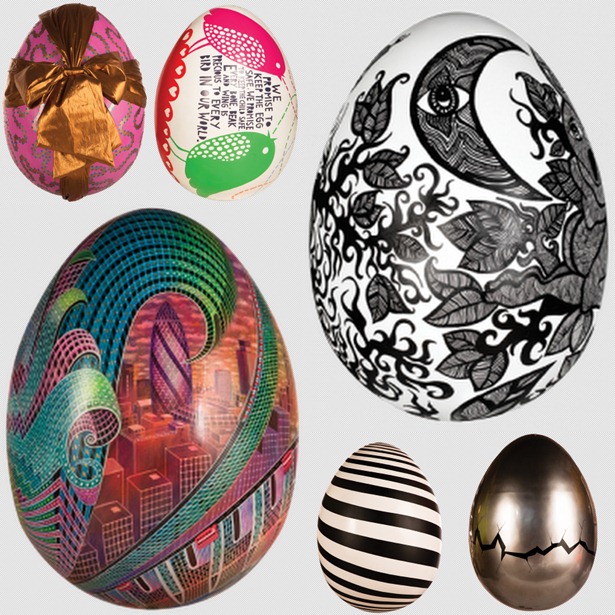
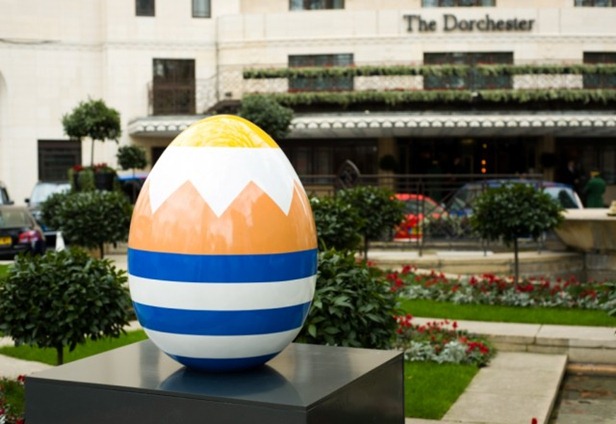
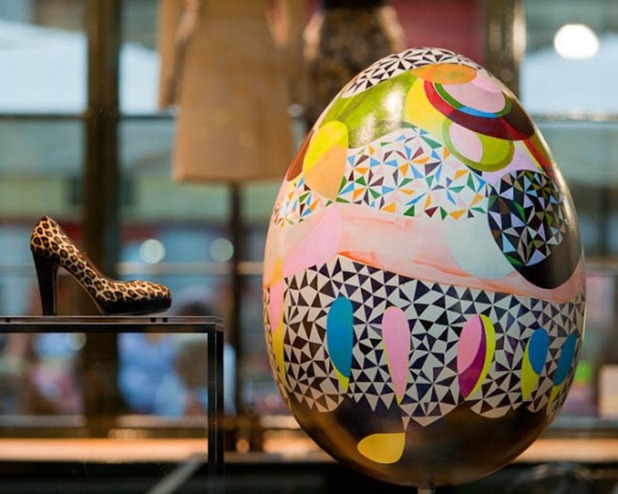
Over the past few weeks my feed has been full of eggs – more accurately some of the two hundred giant eggs decorated by famous artists, designers and other creatives, such as Zandra Rhodes and Mr Brainwash – which were part of the Faberge Big Egg Hunt which has been taking place all over Central London. Although we had a Nutcracker March in Seattle a few years back, I believe this is the first time a similar event has happened in London.  I so wish we’d been there for this – the Minx and I would have been all over it.

So now that your weekend of egg decorating and egg hunting has drawn to a close, here’s a look at how the professionals do it.


big egg hunt2

timthumb

richard-isaac-faberge-big-egg-hunt-580x464


The Fabergé Big Egg Hunt from we are fallon on Vimeo.


Did any London peeps get to go egg hunting? Was it as fun as it looks?


Update: Many thanks to reader K for pointing out that there was a Cow Parade in London a few years back.  That one completely passed me by.

   
Share

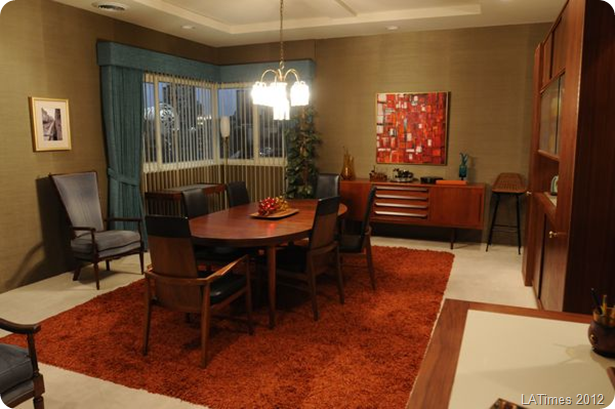
Mad Men: More On Don Draper’s New Apartment


don-draper-dining-room


It went a little crazy round these parts when I wrote my recent analysis of Don Draper’s new apartment, so for the 47% of you who watch Mad Men (and for the remaining 53%, why the heck don’t you?), here are some more great articles I’ve found online about his new digs.

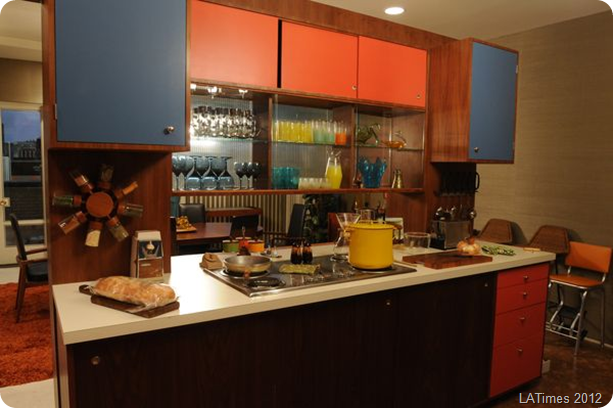
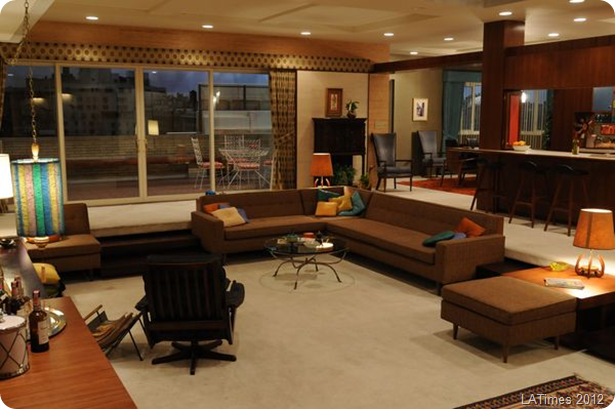
Firstly the LA Times did a great interview with set designer Claudette Didul about how she put the look together, and including a list of shopping resources.


don-draper-kitchen


Secondly, the LA Times also did a piece on the reaction to Don’s new pad online and included a link to THIS.VERY. BLOGAnd they called me ‘astute’.  What a remarkably sensible and insightful paper the LA Times is! 

The divine Tula, shopping guru extraordinaire, wrote two great pieces.  One on how to recreate Don’s apartment in your own home and another on how you can channel your inner Megan.


don-drapers-living-room


And the ever fabulous Tom and Lorenzo are again doing their weekly episode by episode Mad Style round-ups, which focus mainly on the fashions, but also on the interiors and sets.  I swear only people who are more insightful and knowledgeable about the show are the writers and producers themselves.

   
Share