Weekend Link Love

instagramApril2014(1)

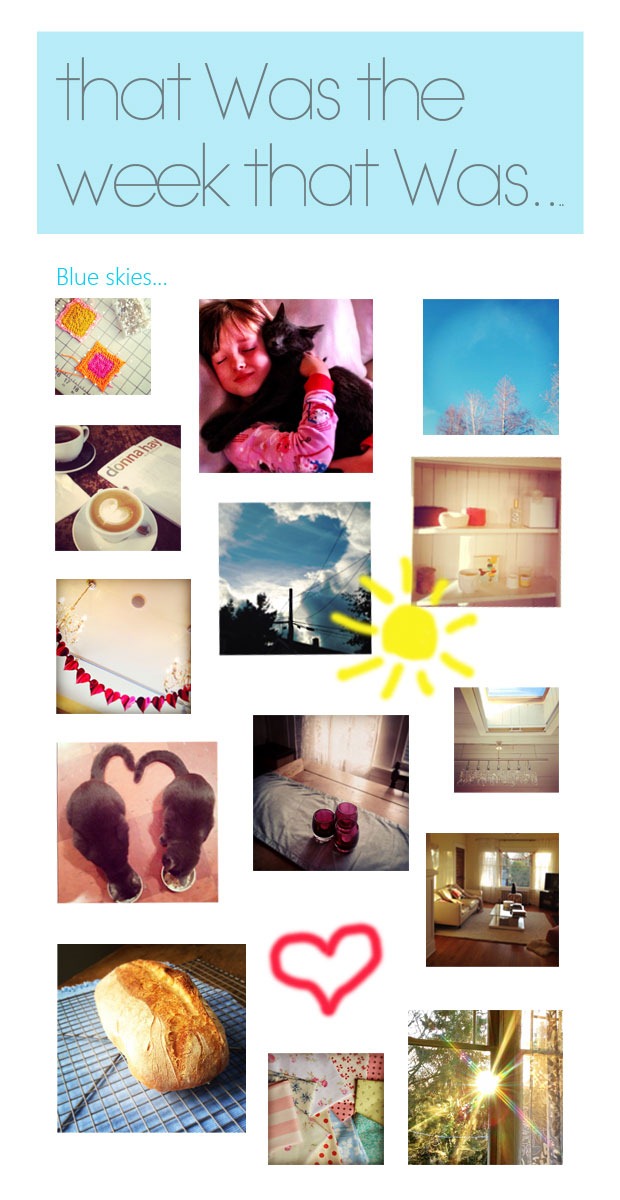
It’s been a week full of Spring here in Seattle, though looking back I have not been a very prolific Instagrammer. Been too busy trying to get my life back together after all my travels and birthday parties and cake baking. The good news is that I’ve pretty much finished unpacking, so I’m no longer tripping over suitcases in the middle of the night as I go to the bathroom. Go me!

Here for your weekend delectation and delight are some links that caught my fancy this week.

Ever fancied ghosting for a cookbook writer? This article shows you how famous celebrity chefs are able to carry on churning out cookbooks while they’re busy making their TV shows/ running their restaurants/sunning themselves in the South of France etc.

These thought-provoking photos by Dina Goldstein show the Disney Princesses as you’ve never quite seen them before.

If you still want to believe in fairytales, these incredible portraits by Alexia Sinclair might help.

Simi Jois from Turmeric ‘n Spice gives us a tutorial on how to paint background prop boards for food photography.

This post on focusing on the essentials of life really resonated with me.

And here on the blog I’ve actually been blogging! Truly it’s been an incredible week.

We’ve been discussing WTFery from Kim Kardashian and Anna Wintour, looking at images from the Food Markets of the Cote D’Azur, shopping ‘til we dropped on #BlogTourNYC at Michele Varian’s NYC Shop, taking a look round the Architectural Digest Home Design show, welcoming April and peeking into my first StitchFix box.

This weekend I’m going to be relaxing after my hard week of blogging and last weekend’s cake/party extravaganza. Next week on the blog I’ve got a gorgeous recipe to share with you, I’ll be revealing said cake extravaganza and there’ll be much more from #BlogTourNYC.

Have a good weekend! What are you chaps up to?

Share

Heart Shaped Cake


Heart Shaped Cake photography by www.paolathomas.com


Dear hearts I am back! Had a bit of a recurrence of the health problems which plagued me last year – adrenal fatigue, I’ll write a blog post about it one day soon – but I’ve been resting up and feeling good again.


Heart Shaped Cake photography by www.paolathomas.com


And I need to get back to full blogging capacity because I’ve had some fabulous news that I’ve been bursting to tell you for some time now.

I’ve been chosen to be one of the featured bloggers on Blog Tour 2014 to New York City where we’ll be visiting the Architectural Digest Home Design Show and partaking in all sorts of fabulous shenanigans. Here’s the official announcement from organisers Modenus. Not sure how I managed to slip in among all those eminent interior designers to be honest.

I don’t know much about the itinerary as yet, except that we will be staying in a sexy midtown Manhattan hotel and spending a day at the Design Show. The last day of our tour will be organised by Tina and Sarah of NYC interior design studio Franklin Eighth.  You may remember Tina as a monthly guest blogger on this very blog, so I know it’s going to be good.

Anyway, all this means I have the best possible reason to boost up this blog and my social media presence again, so do stick around for the ride. I’ll let you know a lot more details on the itinerary as I get them. #BlogTourNYC is happening from March 18th to 22nd.


Heart Shaped Cake photography by www.paolathomas.com


In the meantime, here are some random pretty pictures of the chocolate heart shaped cake I made for my dearest best beloveds on Valentines Day.  I again used the deliciously tasty and extremely forgiving ‘Mom’s Chocolate Cake’ from the first Macrina Bakery cookbook and the heart-shaped pan I bought ages ago from Ikea.


Heart Shaped Cake photography by www.paolathomas.com


I frosted it with my usual buttercream (2 sticks/8oz/225g of butter to 6 cups of sifted icing/confectioner’s sugar) and added a little pure raspberry puree for both colour and flavour. I used a Ateco 825 icing nozzle, as I don’t have the rose tip that everyone else uses. Need to rectify that.

If you make and eat this cake please think of me. Due to the aforementioned adrenal fatigue I’m not actually supposed to be eating sugar. Ugh.

Share

Fancy Hotel of the Week – Chateau Whistler Christmas

  We’ve just concluded a weekend of festivities for the Minx’s birthday and it feels like the New Year has finally started. I actually love this time of year as I feel no guilt about sitting indoors in front of my computer, hiding from the unremitting greyness and gloom of a Seattle January, and can actually get sh*t done. Chateau Whistler Christmas photography by www.paolathomas.com Although Christmas feels like a long time ago now, I just wanted to share some photos of our trip to Whistler this year, mostly because we had the most wonderful time. We don’t have any family here in the States, so it’s become our tradition to drive up to Whistler and take a pampering break in a hotel. This year we managed to score a deal and stayed for the first time at the Fairmont Chateau Whistler, nestling at the foot of Blackcomb Mountain in Whistler’s Upper Village. And all was utterly perfect. Unfortunately for our finances it was so perfect that we might just have to return every year, deal or no deal. From the minute we drew up at the front entrance, it felt like Christmas had begun. Chateau Whistler Christmas photography by www.paolathomas.com   Chateau Whistler Christmas photography by www.paolathomas.com Chateau Whistler Christmas photography by www.paolathomas.com Yes, roaring log fires, a quite ludicrous number of Christmas trees, life-sized gingerbread houses, beautiful wintry walks across the golf course, a big Christmas dinner-dance, macarons and chocolate fondue on tap, a very hard-working Santa and Mrs Claus, and even a Christmas stocking hung on the door of everyone’s room on Christmas morning are going to very difficult to beat.

Chateau Whistler Christmas photography by www.paolathomas.com Chateau Whistler Christmas photography by www.paolathomas.com

There was obviously also far too much scope for ‘sparkly light’ photos. Apologies. The Minx-sized gingerbread house was all completely edible and smelt incredible. Chateau Whistler Christmas photography by www.paolathomas.com Chateau Whistler Christmas photography by www.paolathomas.com The view from our room. Chateau Whistler Christmas photography by www.paolathomas.com Not much snow (though enough for the Husband and the Minx to enjoy their skiing) but the golf course was still pretty. Chateau Whistler Christmas photography by www.paolathomas.com Chateau Whistler Christmas photography by www.paolathomas.com On the night before Christmas Mrs Claus read to the kids under the tree. Chateau Whistler Christmas photography by www.paolathomas.com Then we had enjoyed eiswein and macarons in bed while watching a relaxing movie. And Santa’s special stocking delivery the following day was a really magical ouch. Chateau Whistler Christmas photography by www.paolathomas.com Chateau Whistler Christmas photography by www.paolathomas.com Amazing food, gorgeous decorations and quite a good band actually for the big Christmas dinner-dance.

Chateau Whistler Christmas photography by www.paolathomas.com Chateau Whistler Christmas photography by www.paolathomas.com

Chateau Whistler Christmas photography by www.paolathomas.com Chateau Whistler Christmas photography by www.paolathomas.com It was really hard to leave.

Share

Edible Seattle January


The Minx went back to school this morning, the Christmas tree will be packed away tonight, a watery sun is turning the lake to molten silver and finally I am back at my desk with two grumpy cats who hate the cold. Happy New Year to me.

And January has started in the nicest possible way with my very first editorial photographs in the January/February issue of Edible Seattle !

Edible Seattle January photography by www.paoladavis.com

I can’t show you much until the issue leaves the newstands but here is a sneak peak at my new regular seasonal cake column (which will be appearing in every other issue), featuring my recipe for Spiced Parsnip Cake with Bourbon Brown Butter Frosting.  I will be able to share the proper photographs and full recipe with you all here in a month or two, but in the meantime I recommend that you get the magazine if you’re in the Seattle area. Loads of fabulous seasonal recipes to be found within its pages.

I also recommended to new editor Tara that she interview the inimitable Vicky Brown of Little Brown Farm whom I met on the Whidbey Island Farm to Table Workshop. Vicky gave an inspiring and thought provoking interview, and Tara was kind enough to use a couple of the photos I took at the workshop to illustrate it. Of course it is totally impossible to go wrong with cute baby goats.

Edible Seattle January photography by www.paoladavis.com

Again I’ll share the proper pics of our trip to the farm with you at a later date.

In the meantime there is nothing more exciting than seeing your work in print, here’s hoping I get more used to it in 2014!

Share

Project 52: Red Balloons


So last week’s assignment was simple. A concept shot inspired by “Red Balloons’. 

Because I wanted to do something a bit different, and because blowing up balloons makes my cheeks hurt, and because I’m trying to improve my food photography, I decided it might be easiest to just whip up a bunch of cupcakes.


redballooncupcakes


In that I was almost certainly wrong.  Trying to organise and tame that ridicuously curly gift ribbon with tiny bits of sticky tape into strands that might possibly look like they were floating through the air tested my patience to the very limits.  Food and product stylists everywhere, I salute you.

I was worried that the photo above might be insufficiently conceptual, so then dug up a photo I had of a tiny Minx chasing balloons.  I used my still extremely crappy Photoshop skills to turn her into a Brush and included her in the picture.


redballooncupcakes


I wasn’t entirely happy with this shot either as I couldn’t help wishing that the Minx had been stretching up towards the balloons, and the composition just didn’t look right. The Minx thinks it’s fabulous though, so I think I’ll make a canvas copy for her toyroom.

In the end I decided to use the same conceit but have the cupcake balloons wafting in front of the Space Needle.

This involved taking a photo of the Space Needle, converting it to a Brush and then using a mask to reveal the bunch of ribbons.  My Photoshop ‘skills’ pretty much exploded at this point.


redballooncupcakes


To be honest, I think this is my least favourite of the Project 52 images I’ve produced to date, and I’m not sure that red flying cupcakes look particularly appetising, which, after all, is the point of food photography.  But it was a fascinating creative exercise and certainly tested my Photoshop skills, such as they are, to the very limits and beyond.


HOW TO CONVERT AN IMAGE INTO A BRUSH IN PHOTOSHOP

You can convert any image into a brush in Photoshop which gives it an interesting flat effect and means you can colourise it, move it about, multiply it, turn it, stamp your photos with it and do all sorts of jiggery pokery (note use of correct Photoshop terminology).  In fact do all the things you can do with the standard Brushes, but with a photo.

– Use your preferred selection tools to select the area of the image you wish to use.  (I had trouble selecting the Minx as you can see, the Space Needle was much simpler).

–  Go to Select –> Inverse and then delete the areas of the image you don’t want to use, so that you end up with your image on a transparent background.

– Convert the image you want to use to black and white, remembering that grey areas will show up in the brush but white areas will be transparent.

– Adjust contrast etc. to get a good strong B/W image

– Draw a box around the image with Rectangular Marquee Tool and go to Edit –> Define Brush Preset. And that’s it, you’ve created a new fancy Brush!

– If you want to save your brush permanently go to Window –> Brush Presets –> click on the Brush Presets Icon (second from left along the bottom) and Select the Brushes you want save. Then save them in a named set.

If you want to download some groovy premade Brushes for your digital artwork, check out Brusheezy or TwoPeasinaBucket.

And if you want to see how Photoshop Brushes can be used to make all sorts of crazy and inspiring art then check out this CreativeLIVE course with the incredibly bubbly and charming Khara Plicanic, which was one of the most fun courses I attended at Photoshop Week.

I spent the last couple of days at CreativeLIVE again, doing a course on Photoshop Working Foundations with ace photographer and Photoshop guru Ben Willmore.  My only regret is that I wish I’d done this course before Photoshop Week as I would have got so much more out of all the other courses I sat through. 

I can’t recommend this course highly enough if you want to get the basics of Photoshop – selections, layers, masking, adjustments etc. down pat. One of the most useful courses I’ve ever done and it would be a great purchase if you are fairly new to Photoshop.

     
Share

Project 52: Food Glorious Food


I’ve been having fun with my Project 52 assignments recently.  The last two assignments have been to take hone in on the type of commercial photography we want to focus on and to take a picture of the raw ingredients for a simple recipe.

So I got to shoot food and more food.

First up I decided to shoot a graphic shot of doughnuts.  I was feeling lazy and baking is tricky at the moment without a proper kitchen, so I picked up some Krispy Kreme doughnuts and then mixed up a pink glaze to get some interesting drips and splodges.


doughnuts (1 of 1)


For the raw ingredients challenge, I tried to get a bit arty and was inspired by the idea of an artist’s palette.


beetandorangesalad


Beetroot, Orange and Pistachio Salad

Roast some beets whole in their skins in a little olive oil, salt and herbs (some thyme branches are good) until soft.

Peel the beets and make a salad with some perky watercress or rocket/arugula, some peeled orange segments, some pistachios or pecans and some chunks of goat cheese.

Dress with sea salt, extra virgin oil and some good syrupy balsamic vinegar.

Slowly and painfully I feel that I am groping towards a style – I’m not there yet, but it definitely involves interesting colour stories, graphic elements, shapes and repetition and lots of mess.

   
Share

Meyer Lemon and Rosemary Posset


meyerlemonposset (1 of 1)


Last year we planted a little Meyer lemon tree at the south side of our house by a sheltered wall. 

There had been a citrus bush there when we moved to the house, so we knew one could grow outside, but it hadn’t survived the recent snowy winters. This winter on the other hand has been extraordinarily mild, so we were rewarded with a bumper crop of lemons from our new baby.


meyerlemonposset (1 of 4)


Sssssh all of you folks in California, stop laughing. Words cannot explain how proud we were of the little Meyer Lemon Tree That Could. This is the frozen North after all.

For those of you in the UK, Meyer lemons are an intriguing fruit, which I had never come across before moving here. Thought to be a cross between a traditional lemon and a mandarin, they are softer, sweeter, less acidic and a slightly deeper yellow than a traditional lemon, and therefore highly prized for dessert making within their short season.  Meyer lemons can be replaced by traditional lemons whenever you see them in a recipe.

Anyway, I wanted a recipe where my one tiny lemon would be the feature ingredient rather than being an afterthought and was given a simple and but glorious one by a lovely Facebook friend.

This is deceptively simple but utterly delicious. Your next dinner party is crying out for this dessert.


meyerlemonposset (2 of 4)


A posset is a traditional English dessert where cream is heated and then slightly curdled by the application of an acid, such as lemon juice or wine, so that it sets. The infusion of rosemary adds an intriguing savoury undertone that marries perfectly with the lemon.


Ingredients

Serves 4

2 cups (approx 500 ml)) heavy/double cream

2/3 cup (90g) organic sugar

1 sprig fresh rosemary

5 tablespoons Meyer lemon juice or any fresh organic lemon juice


Method

Bring the cream and sugar to boiling point in a small saucepan, stirring to dissolve the sugar. Add the rosemary. Remember that the boiling point of cream is much lower than that of water, so take care that it doesn’t boil over.

Remove the saucepan from the heat, add the lemon juice and stir and allow  the mixture to cool for 15 minutes. Remove and discard rosemary. Pour into 4 ramekins or glasses.

Chill until set, about 4 hours.


meyerlemonposset (3 of 4)

   
Share

Paleo Chicken Curry


quickchickencurry (7 of 9)


It has become increasingly obvious that my body is completely incapable of tolerating carbs, so at the beginning of the year I decided to start eating the Paleo way. It’s not a diet per se, but I know I feel about a million times better if I cut my carb and sugar intake to a bare minimum.

Since this dish is based on ready made curry powder and mango chutney it is remarkably quick and easy – we make it all the time for a weekday supper – but still quite delightfully fruity, aromatic and succulent. I miss good curry like nobody’s business here in Seattle, and while this is not remotely authentic, it certainly hits my curry sweet spot. (And yes, I know that mangoes aren’t strictly Paleo, but I figured the small quantities used here wouldn’t hurt too much.)


quickchickencurry (1 of 9)


Because they are so integral to the dish it is important that you use the best quality curry powder and mango chutney you can lay your hands on – that ancient pot of stale, yellowish-brownish power at the back of your store cupboard is not going to cut it, nor is a jar of sickly sweet jam-like commercial mango chutney. 


quickchickencurry (3 of 9)


Instead go to a good grocer or supermarket where they might sell curry powders imported from India, and high quality artisan chutneys, full of fruit and whole spices; or try your local spice shop or gourmet food shop. I like to experiment with different spice blends and chutneys and make subtly different versions of this dish. I’ve had good success using Sun Brand Madras curry powder imported from India and available on Amazon and Neera’s mango chutney.


quickchickencurry (9 of 9)


Ingredients

1 tablespoon coconut oil or ghee

1 large onion, thinly sliced

3 cloves garlic, crushed (or to taste)

1 small fresh red chili, finely chopped

2 tablespoons curry powder (or to taste)

2tbsps coconut oil or ghee

1 boneless, skinless chicken (I used chicken thighs, but you could also use breasts) cut into thin strips

1 cup mango chutney

1 1/2 cups coconut milk or single cream (half and half)

1 bag of baby spinach or some fresh sorrel if you’re lucky

Salt and pepper to taste

Coriander (cilantro) to garnish


quickchickencurry (4 of 9)

 
Method
 
Heat the oil or ghee in a large steep-sided frying pan or skillet.  Coconut oil or ghee are recommended  for Paleo cooking and are absolutely delicious in this dish, but you could also use vegetable oil.
 
Saute the onions and garlic until soft and then add the chili and curry powder.  Fry for a minute or two until the spice become fragrant.  Add the chicken strips and saute until brown all over.
 
Add the mango chutney and coconut milk (or cream) and then cook at a medium heat for about five minutes until the chicken is cooked through.  Add a huge heap of spinach or sorrel and continue cooking until the spinach has wilted into the curry.  If you’re lucky enough to have some sorrel, the lemony sharpness is perfect for this.
 
Season to taste and garnish with a little lime and cilantro (coriander).  To keep with the Paleo theme, I like to serve this with tiny roasted cauliflower florets, but some Basmati or jasmine rice would obviously work too.


quickchickencurry (5 of 9) quickchickencurry (6 of 9)


quickchickencurry (8 of 9)

   
Share

Adventures in Baking: Focaccia


focaccia-6


So in an effort to work on my food photography I’m doing this thing called Souvenir Foto School – Food+Foto.  Each week for four weeks, we’re given different courses of a virtual dinner party to make and photograph. Recipes are provided but we can also use our own recipes or buy in our own food. I’m feeling particularly inspired as the menu given is an Italian one, so it gives me a chance to go back to my Italian roots.

This week the first course of the dinner party was ‘ flatbreads and infused oils’, which gave me a great excuse to bake my favourite focaccia recipe, which comes from Claudia Roden’s The Food of Italy. As an aside I can’t recommend this book highly enough – it’s packed full of comparatively simple but very traditional Italian recipes, the sort of thing my Italian family cooks all the time – plus lots of little anecdotes and stories from Roden’s travels. 


focaccia-4


Ingredients

1kg (2lbs) plain or all-purpose flour

1 tsp salt

25g/1oz dried yeast (1 sachet is perfect)

About 500 ml (2 1/4 cups) warm water

4 tbps good olive oil

Additional oil for oiling the baking sheet and brushing the bread

Coarse sel gris, rosemary, sage, thinly sliced red onions or cherry tomatoes for the toppings


focaccia-3 focaccia-5


Method

Put the flour in a big bowl and make a well in the centre.  Activate the yeast according to the packet instructions and add it to the flour (either hydrate it in some of water or just stir it into the flour). Add the salt and olive oil.

Then add enough warm water to make a workable but slightly sticky dough.  I ended up adding a little more water this time round.

Knead the dough for 10-15 minutes until it is soft and elastic.  You need to get to about medium gluten development on the window pane test, but I don’t normally get that technical.

When it’s ready, cover the dough with oil and leave it in a clean bowl in a warm place until it has at least doubled in bulk. You could leave it in the fridge overnight if necessary.

After the initial rise, punch the dough down and divide into two. Shape each portion into a rectangle and place on an oiled baking sheet (I find 13’ by 9’ pans perfect for this).

Use your fingers to press and push the dough out until it fits the pans.  It should end up being about 1 inch thick and you should be able to see the indentations from your fingers in the dough. They are what catches the oil and flavourings, so push firmly.

Brush with oil and sprinkle with coarse salt and herbs, or add thinly sliced red onions, or halved cherry tomatoes. Let the dough rise again until it’s puffy all over and about two inches thick.


focaccia-7


Whack your oven up to the highest setting and set a cast iron pan or similar in the bottom.  Put the bread in the oven, and simultaneously add a cup or two of water to the hot pan in the bottom to create steam. Shut the oven door quickly and don’t open it for about 15 minutes. Your bread should be golden brown and ready after about 20 minutes.  When ready, tip it from the pans, brush it again with oil and serve warm.

I also made a couple of simple infused oils..  I just added some springs of rosemary to one batch, and some small whole dried chilies, slivers of garlic and strips of lemon zest to the other.


focaccia-2

   
Share

Les Jardins Macarons by Pierre Herme


pierre-herme-macaron


Since we’ve been chatting about both macarons and interesting food styling I thought I’d share the latest creations of master macaronier Pierre Herme’.

Through his online club ‘Les Jardins’ he is making a new limited edition flavour macaron available every month. Tragically they will only ship to the UK and Europe (which is officially NOT FAIR). 

Us poor unfortunates in the US and elsewhere in the world will have to make do with gazing longingly at the breathtaking food photography of French photographer Bernhard Winkelmann or attempt to make our own using Pierre Herme’s book ‘Macarons’ which I have, but which has officially scared the sh*t out of me, starting as it does with a chapter entitled ‘Thirty Two Steps to Successful Macaron Shells’.

I’m also wondering if some of these flavour combinations aren’t in reality ‘a step too far.’ Does someone want to buy some and report back?  I think I like the sound of Lime, Raspberry and Piment d’Espelette best.  What do you chaps think? The full list of monthly flavours released so far is here.


pierre-herme-macarons

Green Tea, Chanterelle and Lemon

pierre-herme-macarons6

Lemon and Caramelised Fennel

pierre-herme-macarons2

Lime, Raspberry, Piment d’Espelette

pierre-herme-macarons7

Chocolate & Lime

pierre-herme-macarons9

Violet & Aniseed

All pictures by the amazing Bernhard Winkelmann.

Share