As promised many moons ago I can now finally reveal my recipe for the Parsnip Cake that debuted back in Edible Seattle in January of last year. Editor Tara and I wanted the cakes in this series to make the most of seasonal, local fruits and vegetables, which hugely limited our scope in January when all that seems to be available round these parts is mountains of kale.
We started playing with the idea of root vegetables and I remembered a carrot cake I had made for the Minx’s first birthday party back in the Dark Ages. The cake I had in mind was a moist, squidgy cake, dense with raisins, and warmed with spices and maple syrup – a comforting wintry sort of cake, made all the more so by snowy swirls of cream cheese frosting on the top. And then we started toying with the idea of substituting parsnips for the carrots.
It seems obvious that carrots can be added to cake – their flavour is delicate, sweet and clean and they are delightful eaten raw. Raw parsnips on the other hand are not so obviously appealing – the flavour is woody, less sweet and just deeply, deeply vegetably. So it was with some trepidation that I lifted that first test cake out of the oven. I needn’t have worried, the alchemy of baking had worked again. The parsnips had roasted within the cake to become soft, sweet and totally unrecognisable as parsnips, just adding an intriguing smoky undertone. Make this cake and I defy anyone to identify the secret ingredient. (The Minx adores this cake BTW).
I made a couple of other changes and substitutions, most notably replacing the raisins with tart dried cranberries, as they seemed more seasonal, and I liked the idea of cutting the rich sweetness a little. A cream cheese frosting, as is usual with carrot cake, seemed to be the way to go, adding another little tang to cut the sweetness, but this time I experimented with browning the butter and adding some bourbon to bring out the smoky woodsiness the parsnips had added to the cake. I warn you now, this frosting is like crack on a spoon.
The photography process was interesting too.
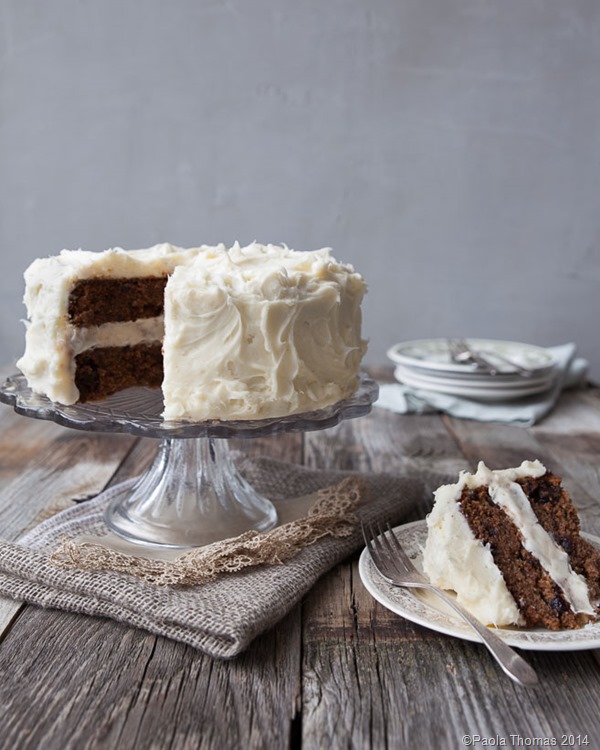
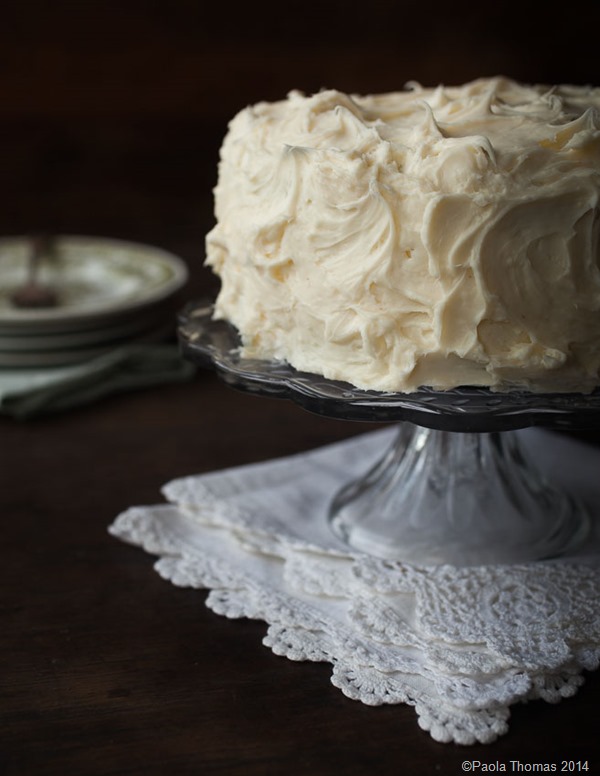
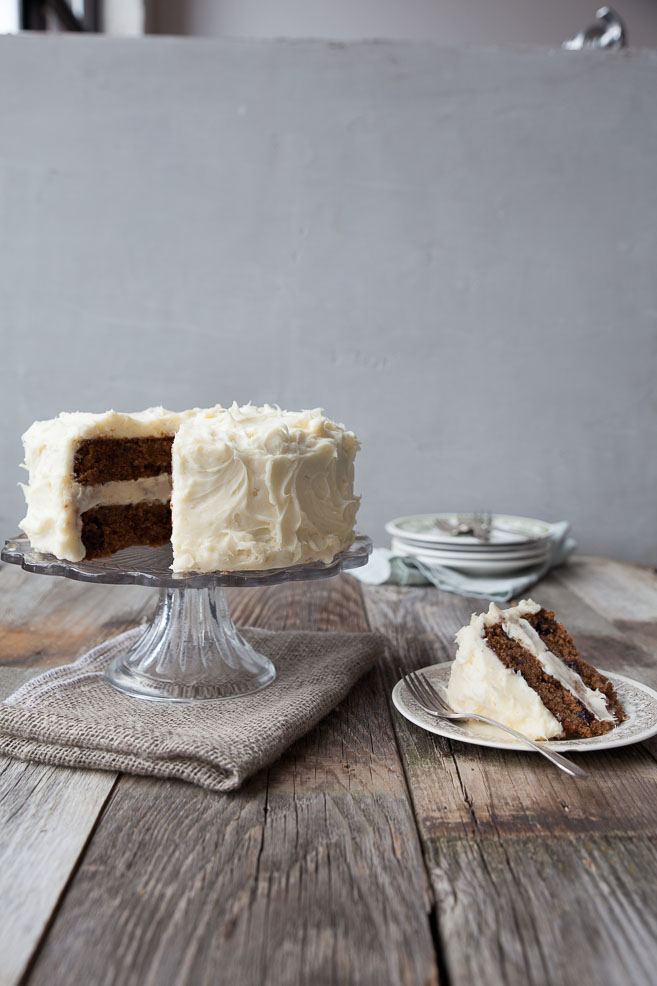
Following Tara’s art direction I started experimenting with something fashionably moody and almost Rembrandt-y in its lighting, but that seemed too spare and gloomy for this simple cake with its dark interior and plain white frosting. I decided instead to go for a lighter, cool blue grey palette instead, which would contrast with the rich browns of the cake, but seemed wintry in a more hopeful way and layered on the textures – weatherbeaten wood, rough burlap, vintage lace and hard glass to contrast with the soft sumptuous swirls of the icing.
We decided to slice the cake to make it more interesting and so it didn’t end up being just a giant white blob, but getting the slice positioned correctly was a challenge. Too far forward and the slice was in focus but the cake looked like a heap of mashed potato, too far back and the cake looked lovely, but the slice looked unappetising. It took me many shots before I realised that both cake and slice had to be on the same plane of focus and that I had to position something WAAAAYYYYYY at the back to take the eye through the photo and get enough blur that it wasn’t distracting to the main event.
They both took some experimenting, but I ended up being delighted with how both cake and image ended up. And I suggest you root around (ha!) in your vegetable bin, find some parsnips and get baking. And without further ado, here is the recipe you need.
- 1 1/3 cups grated parsnip (woody cores removed)
- 1 cup dried cranberries, roughly chopped
- 6 tablespoons olive oil
- 1 cup light brown sugar
- 1 2/3 cups wholewheat flour
- 1 teaspoon baking soda
- 1 teaspoon baking powder
- 1/2 teaspoon grated nutmeg
- 1/2 teaspoon powdered cinnamon
- 8 tablespoons maple syrup
- 4 tablespoons orange juice
- 1 stick of butter
- 8 oz pack of cream cheese
- 1 cup powdered (icing) sugar (sieved)
- 2 tablespoons bourbon, or to taste (optional)
- Preheat the oven to 375 degrees Fahrenheit (190 degrees Celsius)
- Grease and line the bottom of an 8 inch springform cake pan
- Combine the parsnip, cranberries, oil and sugar in a large bowl.
- Add the flour, baking soda and powder, nutmeg and cinnamon, maple syrup and orange juice. Stir until everything is combined in a sticky, wet batter.
- Spoon into the prepared cake pan, level the top and bake for an hour, or until a skewer, knitting needle or stick of spaghetti stuck into the cake come out clean. The top of the cake should be firm.
- Let the cake cool in the pan before removing.
- Melt half the butter in a small pan over a low heat, stirring occasionally, until the milky solids turn medium brown and give off a nutty aroma (3-5 minutes).
- Remove from the heat immediately and set aside.
- Cool for about three minutes.
- Beat together the cream cheese and remaining butter.
- Pour on the browned butter and mix on a low speed until the mixture is cooled.
- Add the sugar a little at a time until fully combined and then increase the speed and beat the frosting until it is light and fluffy (about 3-5 minutes)
- Add bourbon to taste and mix until fully combined
- Use a knife or offset spatula to spread a thin 'crumb coat' of frosting over the fully cooled cake
- Add another generous layer of frosting and craft swirls with the back of a spoon.
- The recipe makes an 8 inch cake with frosting. For the large cake in the photograph I used one and half times the cake recipe and a double batch of frosting.The larger cake can be baked in the same 8 inch springform tin, but add around 15 minutes to the baking time and make sure you check for doneness with a skewer. Split the larger cake into two separate layers before icing.



Love the photography! Lace, barn board and lush cake. Yum…
…a beautiful study in contrasts!
Grazie cara! It was interesting trying to make things say ‘January’ without being too cold and gloomy….
Responding to the season is a never ending but satisfying challenge…I love your silver/brown solution and I really appreciate the insight into the arrangement of the photograph. The stack of plates in the far background does indeed draw the eye through, and the hint of green on the plates is also very Northwest-winterish and adds a further dimension to the color. I love parsnips, so I will be making this cake. Nice work!
Thanks Dana. Saying it looks ‘North West winterish’ has made my day as that is what I was aiming for. Thanks also for noticing the hint of green in the plates. I’d been experimenting with trailing green ivy on the table, but having green in the plates seemed a bit less contrived…
Really interested to hear the thinking behind the shot – would love you to do more of these posts… my biggest challenge is taking food photos in dark restaurants while pretending to be a normal punter – sometimes even a 50mm lens doesn’t allow me to go much lower than 6400 ISO.
I’m going to do one of these for every one of my Edible Seattle posts. I’ve been learning a ton from doing them.
As for the dark restaurant bit, I can only suggest that you open up the aperture as much as possible, get a little bean bag to support the camera, so you can open up the shutter without camera shake, or I even know people who bring in little lights…
What beautiful photographs, Paola. And the cake isn’t floating mysteriously in space!!!
Thanks for sharing your photography process. I agree with Deri — please do more of these posts.
Ha! Yes. I learned a lot on that shoot. I will be doing more as this seems to have been a hit…
I came across this post while doing an internet search on how to do traditional frosting swirls. I’d love to know how to recreate your picture-perfect frosting job. I see that the recipe states that the swirls were created with the back of a spoon. Are there any special techniques or other tools used in the process? This is truly my idea of a perfectly frosted swirly cake. Kudos!